When you add a ticket to your event, you can choose from four different pricing modes. For a quick overview watch the video below. For more specific setup details click on the pricing option below.
Fixed Price
The price remains the same for the duration of sales.
- Select "Fixed Price" from the drop down
- Enter a price and Save

Name Price
The customer chooses a price, for example in fundraising or charity events.
- Select "Name Price" from the drop down
- You can leave the price blank or enter a minimum price
- When finished, click Save

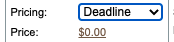
Deadline
The price changes based on calendar date.
- Select "Deadline" from the drop down, then Save.
- Click the $0.00 price to open the deadline settings.
3. Create Deadline Dates
-
- Enter a date in the empty deadline and save, another empty one will appear.
- In the calendar window, use the "quick" link buttons to quickly set dates.

4. Add ticket prices.
-
- If a ticket type is not available during a deadline enter -1 for the price. This will show that ticket types as NA for that time frame and it will not be available for purchase.
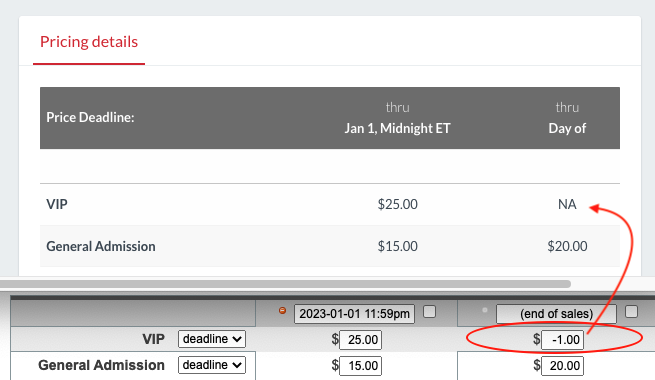
5. When finished, before closing the window, be sure to click "Save Deadline Pricing".
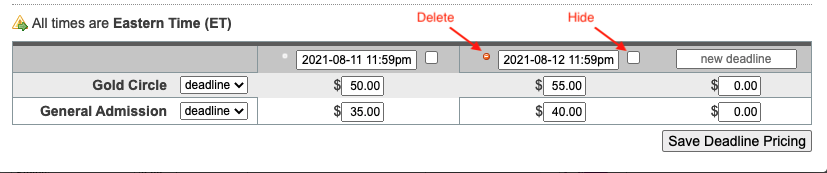
Deleting & Hiding Deadlines:
- Once a deadline has a ticket sold it cannot be deleted. Unused deadlines have a red delete button available.
- Check the box to the right of the date to hide the deadline from view. ⚠️ Hidden deadlines with a current date WILL still be available for purchase on the order page even though they are hidden from the event page. If you need a current deadline to be hidden change it to a past date.
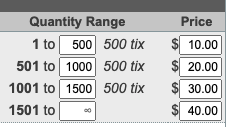
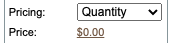
Quantity
The price changes based on how many are sold.
- Select "Quantity" from the drop down, then Save.
- Click the $0.00 price to open the price by quantity settings.
3. Enter the thresholds you want the price to change; and for each quantity range, enter a price.
4. When finished, click Save